
How the West Was Fun: Frontier Arts and Crafts

August 13, 2014
“I knew my heart had found it,
I knew my search was done.
Oh, oh, oh how the West was fun…
Oh, oh, oh how the West was fun!
Westward ho!”
–From How the West Was Fun by Mary-Kate and Ashley Olsen
As you recall from my earlier posts on Art in the Garden, we have covered a wide range of topics, from cowboys and cowgirls to wildlife. Art in the Garden took place three days a week (Tuesday, Thursday, and Friday). On Mondays and Wednesdays, however, we did something different. We hosted Games in the Garden, during which we had historic games for the kids to play that give them a sense of life in the West.
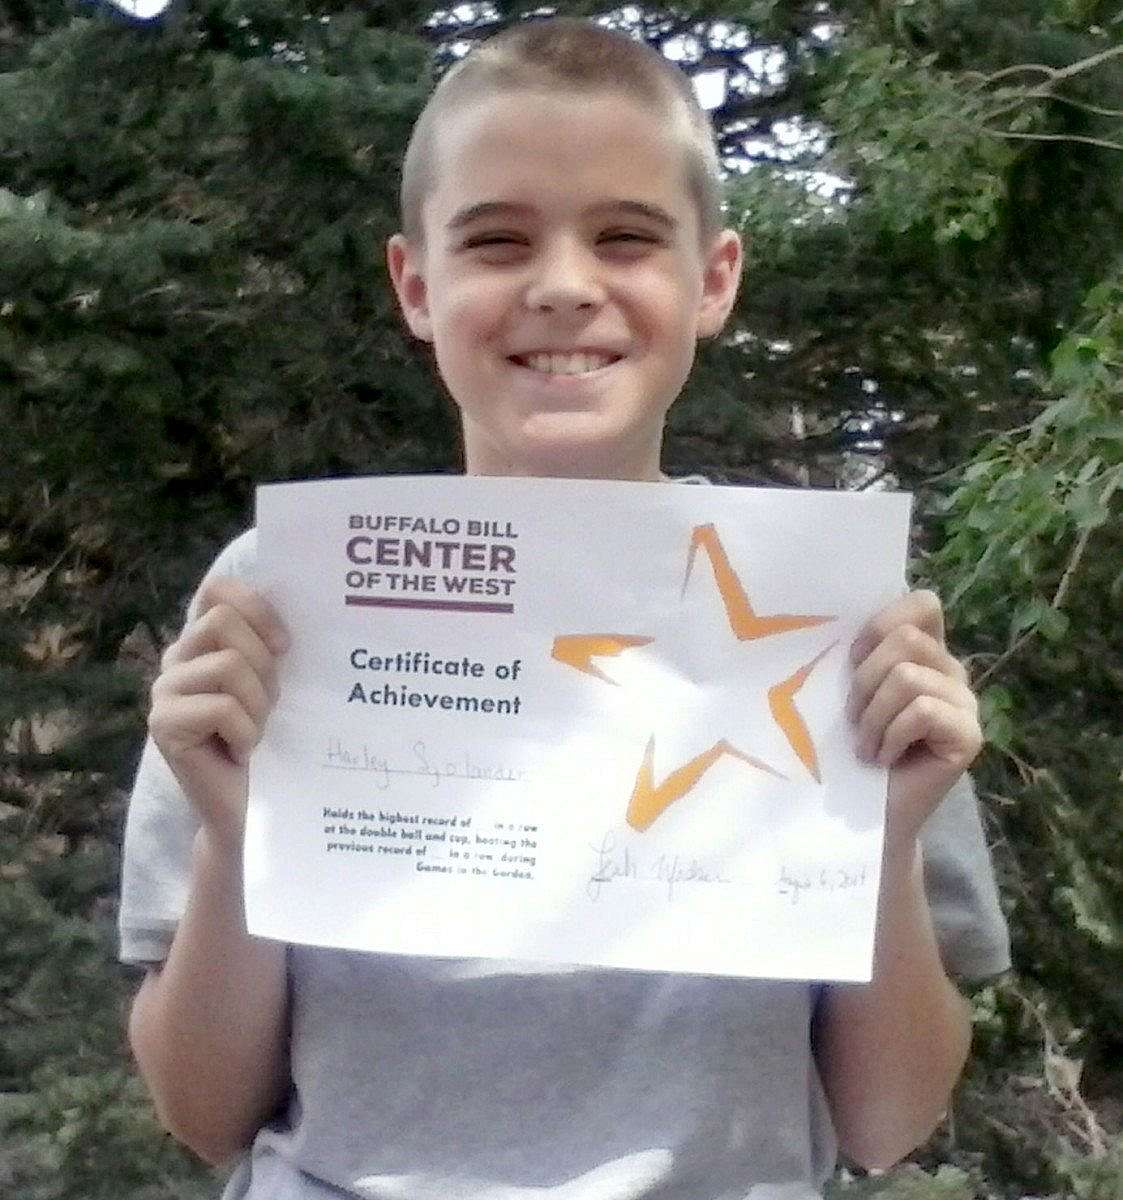
Kids tried playing with grace hoops, buzz-saws, bull roars, and the ball and cup (double and single). The ball and cup toys became so popular that I started keeping track of the record for the most achieved in a row. Our program ended last week, with the record for the most achieved in a single ball and cup by Caleb, who had seven in a row. (Unfortunately, I was unable to get his photograph.) The most achieved in the double ball and cup was 16 in a row, breaking the previous record of 14 in a row, by Harley.
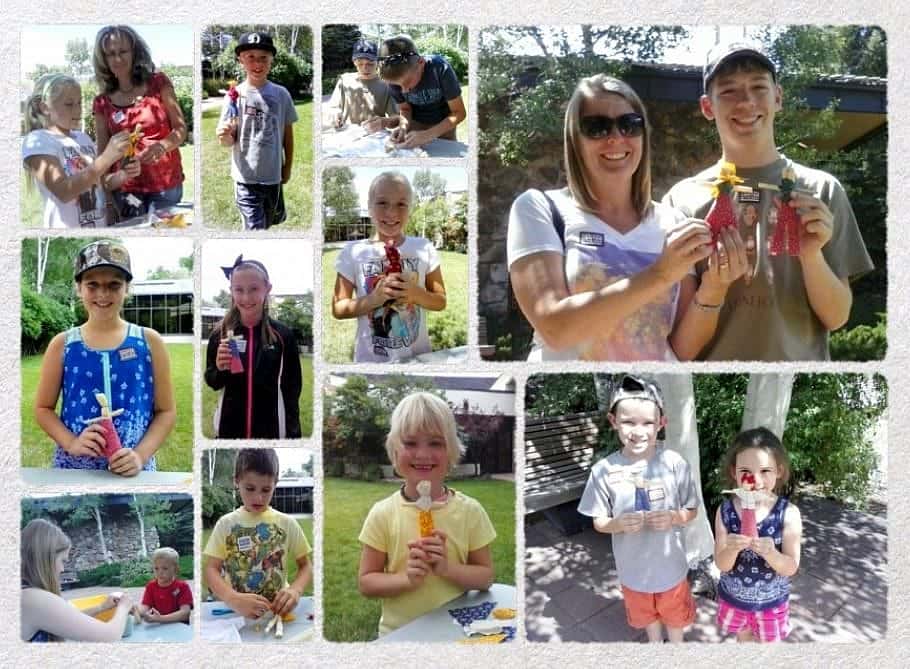
The kids loved playing with all the toys and always wanted to take them home. Since games of the historic West were so popular, I decided one week of Art in the Garden would be themed “Fun on the Frontier.” That week kids created things that settler’s children in the West would have or would have helped create. The kids loved these activities and being able to take home their creations.
Below I have included instructions for these activities.
Fun on the Frontier Crafts

Corn Husk Dolls

Did you know that kids in the historic West used to make their own dolls out of corn husks? Both Native American and frontier children made corn husk dolls. Many Native Americans believed that everything had a use and that nothing should be wasted. After they ate the corn, the husks would be used for many different things, one being dolls [4]. They taught those settling in North America how to grow corn and create things from the husks [5]. Pioneers who journeyed West took the tradition with them, as many were unable to buy toys for their children.
Make Your Own Corn Husk Doll
Supplies:
- Corn Husks
- Tub of water
- Scissors
- String
- Fabric Scraps
Directions:
Before you start, soak the corn husks for a few minutes. The husks should be malleable and not rip. However, if you leave them in too long the husks will be hard to work with.
Corn Husk Girl
- Take three to four corn husks of about the same size. Lay them on top of each other. Make sure that the top part has the wider side.
- Tie a string about one inch from the top of the corn husks.
- If the corn husks are not the same height, trim the tall ones.
- Flip your corn husk bundle upside down. Take the part that isn’t tied with string and peel them down, (much like peeling a banana), so they go over the area tied with a string.
- Then take a piece of string and tie it around the top area that has been folded over, creating a head.
- Take another corn husk and roll it up.
- Take some string and tie both ends so it doesn’t unravel. These will be the arms.
- Take the bottom of the corn husk and lift up the pieces until you find the middle, placing your corn husk arms underneath.
- Take a piece of string and tie it right under the arms, securing them in place and creating a waist.
- Let your doll dry.
- Use the fabric scraps to cut out clothes for your corn husk doll.

Corn Husk Boy
- Follow the above steps, 1 – 9.
- Now take a pair of scissors and cut the corn husk skirt in half.
- Take string and tie it around one skirt half, creating a leg. Make sure you tie about halfway up the leg and around its ankle.
- Repeat for the other side.
- Let your doll dry completely.
- Use the fabric scraps to make clothes for your corn husk boy.
Working with Leather
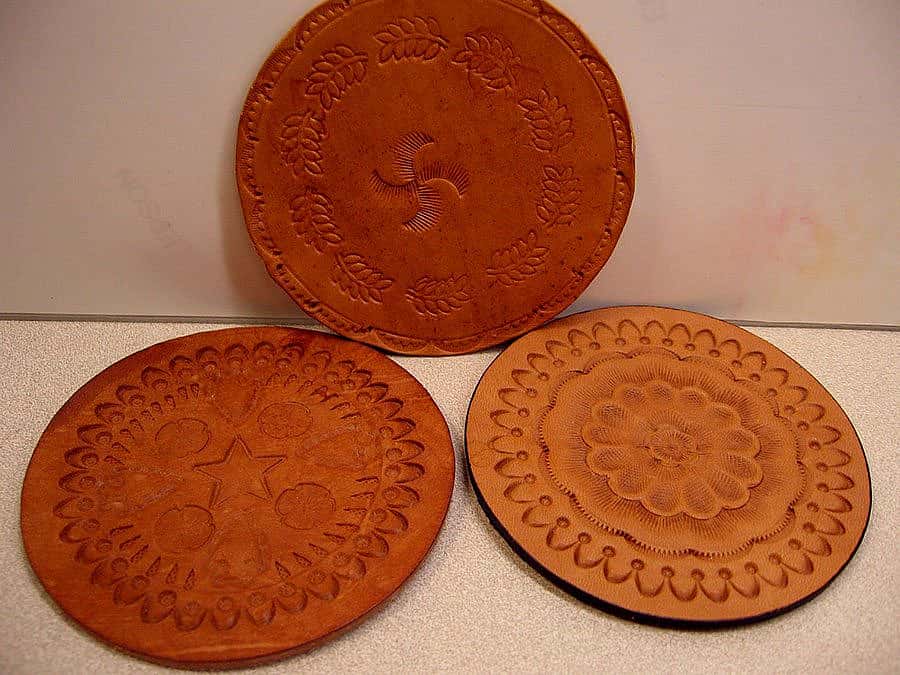
Leather was very important to cowboys. They used it to make hats, chaps, vests, boots, gun belts, belts, and wristbands. Decorating leather became popular because it made the objects more personal, and sometimes practical (such as with boots).
Decorate Your Own Leather
Supplies:
- Leather Pieces
- Tub of Water
- Mallet
- Board or Table
- Leather cutters/tools
- Oil (Olive or Canola)
- Paintbrush
Directions:
- Soak the leather in the tub of water until it is malleable.
- Take the leather out and place it on a table or board.
- Choose which leather cutter you wish to use.
- Place the leather cutter on top of the leather. Hit the end of the leather cutter with the mallet (similar to hammering in a nail).
- Continue with your designs until finished.
- Take the brush and use it to paint oil onto your leather piece. If you don’t, the leather will be extremely stiff and hard when it dries.
- Let your leather dry.

This is a really fun activity, as who doesn’t like banging on things?
For other projects that came out of our Art in the Garden activities, go to a Cowboy’s Life is the Life for Me and Wild Things.
For more on what life was like in the historic West, visit the Buffalo Bill Center of the West
Notes:
1. “How the West Was Fun.” Performed by Mary-Kate Olsen and Ashley Olsen. On How the West Was Fun. 1994.
2. State Historical Society of South Dakota, “Plains Indian Parfleche,” last modified April 1998, PDF.
3.”Parfleche,” in Frontier and Plains Indian Games and Activities, comp. Morgan Maul-Smith (Cody, WY: Education Department, Buffalo Bill Center of the West, n.d.), 42.
4. Institute for American Indian Studies. Corn Husk Dolls. Last modified 2011. PDF.
5. Historical Folk Toys, Early American Corn Husk Dolls (Charlotte, NC: Historical Folk Toys, 2004)
Bibliography:
Agnew, Jeremy. The Old West in Fact and Film: History versus Hollywood, Jefferson, NC: McFarland and Company, 2012.
Institute for American Indian Studies. Corn Husk Dolls. Last modified 2011. PDF.
Historical Folk Toys. Early American Corn Husk Dolls. Charlotte, NC: Historical Folk Toys, 2004.
“How the West Was Fun.” Performed by Mary-Kate Olsen and Ashley Olsen. On How the West Was Fun. 1994.
“Parfleche.” In Frontier and Plains Indian Games and Activities, compiled by Morgan Maul-Smith, 42. Cody, WY: Education Department, Buffalo Bill Center of the West, n.d.
State Historical Society of North Dakota. “Plains Indian Parfleche.” Last modified April 1998. PDF.
Written By
Leah Madsen
Leah Madsen is our current education intern at the Buffalo Bill Center of the West. Miss Madsen recently graduated from Sonoma State University in California with her B.A. in history and art history. While not a native to Wyoming, Miss Madsen has always enjoyed Western film, art, and history; and is excited to be a part of the team this summer.
You May Also Like

Happy Trails to You: Western Music Arts and Crafts
Sep 22, 2014
"Happy trails to you, until we meet again. Happy trails...
How Hawks and Falcons are Different, Plus Other Common Questions
Jul 05, 2026
Birds of the Draper Museum Raptor Experience (All but one...
Wild Wonderland: Yellowstone Arts and Crafts
Sep 08, 2014
"A thousand Yellowstone wonders are calling, 'Look up and down...
Heart Mountain Through the Lens
Jul 02, 2026
Each July, former detainees, their families and descendants, gather at...
Maverick Queens: Women in Western Film, 1947 – 1953
Sep 17, 2014
Photo by Nina Leen, Peter Stackpole, and Cornell Capa for...
Speaking in Code: Rare Winchester Telegraph Code Books
Jun 30, 2026
Among the rarest items in the McCracken Research Library’s archival collections...
From the Cancan to the Wild West: The Remarkable Life of Giuseppina Morlacchi
Jul 14, 2026
The French didn't bring the Cancan to America; an Italian...
The Myth of the Fully Processed Archive
Jul 20, 2026
When you think of an archive, you probably imagine countless collections all perfectly...
Eastern Chic and Western Mystique: New Yorkers and the Buffalo Bill Center of the West
Jun 23, 2026
"The Buffalo Bill Center is the best Western museum that...